Drop Circles 2
Click any Image to zoom out

What is it?
Drop Circles is meant to be a helpful Utility to quickly open explicit Application, either as an Application Launcher or as arg & Drop Destination.
You can imagine it as an “Open with…” Extension.
You can setup up to 8 customisable Circles to perform this Actions:
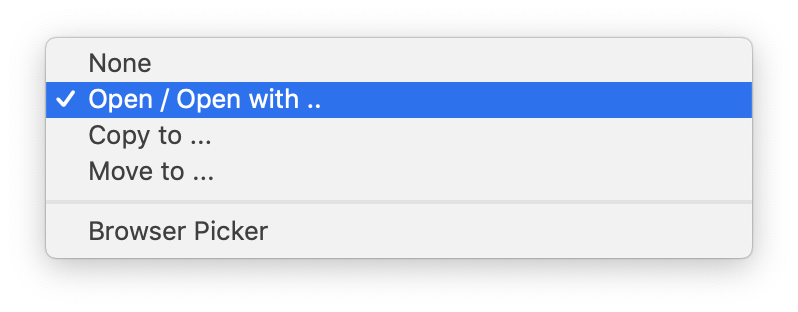
Open with … (Or use it as an Application launcher)
Move this Item to… (can be used as short-cut to the Location)
Copy Item to… (can be used as short-cut to the Location)
- Act as a Browser Picker (read Details further below)
Additionally you have 4 more circles that are Utilities: (read more about them further below)
Simply configure your Circles to either launch an Application by clicking on it or drop any valid Item onto it to open it with this Application e.g.:
Drag an Image to open it with this Application or drop a Link to open it with this Browser.
Or if you set a Circle as a Copy / Move Action, you can simply click it once to get right to the destination without the need of browsing your Hard-drive the usual way.
Drop Circles waits for your Action to activate it by touching the Display left or right Edge to appear. You can eben customise the Activator with Themes, rearrange the Circle Order, toggle between Circle Sets by Tab or Modifier Keys or just with your Scroll Wheel.
And there is the Center Drop Area:
The Center Drop Area can be used to drop anything into it for later reuse, e.g. drop a Text Snippet from a Website you are reading right now to reuse it later anywhere else, or drag an Image from a Website to use it later, and while Drop Circles works flawlessly in Full Screen Applications, you can even use the Center Drop for Drag & Drop actions across multiple Fullscreen Applications.
And with some of the Utilities you can get e.g. a live Internet Traffic Indicator right on your desktop to see whenever you are downloading or uploading something and haw fast it is. The same goes to CPU or RAM Usage Meters.
Make Drop Circles your default Browser to be able to pick a specific Browser on demand, simply hold down the OPTION Key while clicking a Link and you are good to go and choose a default Browser Drop Circles shall use when you do not request a Picker to speed things up…
You can imagine it as an “Open with…” Extension.
You can setup up to 8 customisable Circles to perform this Actions:
Open with … (Or use it as an Application launcher)
Move this Item to… (can be used as short-cut to the Location)
Copy Item to… (can be used as short-cut to the Location)
- Act as a Browser Picker (read Details further below)
Additionally you have 4 more circles that are Utilities: (read more about them further below)
Simply configure your Circles to either launch an Application by clicking on it or drop any valid Item onto it to open it with this Application e.g.:
Drag an Image to open it with this Application or drop a Link to open it with this Browser.
Or if you set a Circle as a Copy / Move Action, you can simply click it once to get right to the destination without the need of browsing your Hard-drive the usual way.
Drop Circles waits for your Action to activate it by touching the Display left or right Edge to appear. You can eben customise the Activator with Themes, rearrange the Circle Order, toggle between Circle Sets by Tab or Modifier Keys or just with your Scroll Wheel.
And there is the Center Drop Area:
The Center Drop Area can be used to drop anything into it for later reuse, e.g. drop a Text Snippet from a Website you are reading right now to reuse it later anywhere else, or drag an Image from a Website to use it later, and while Drop Circles works flawlessly in Full Screen Applications, you can even use the Center Drop for Drag & Drop actions across multiple Fullscreen Applications.
And with some of the Utilities you can get e.g. a live Internet Traffic Indicator right on your desktop to see whenever you are downloading or uploading something and haw fast it is. The same goes to CPU or RAM Usage Meters.
Make Drop Circles your default Browser to be able to pick a specific Browser on demand, simply hold down the OPTION Key while clicking a Link and you are good to go and choose a default Browser Drop Circles shall use when you do not request a Picker to speed things up…
Drop Circles as a Browser Picker

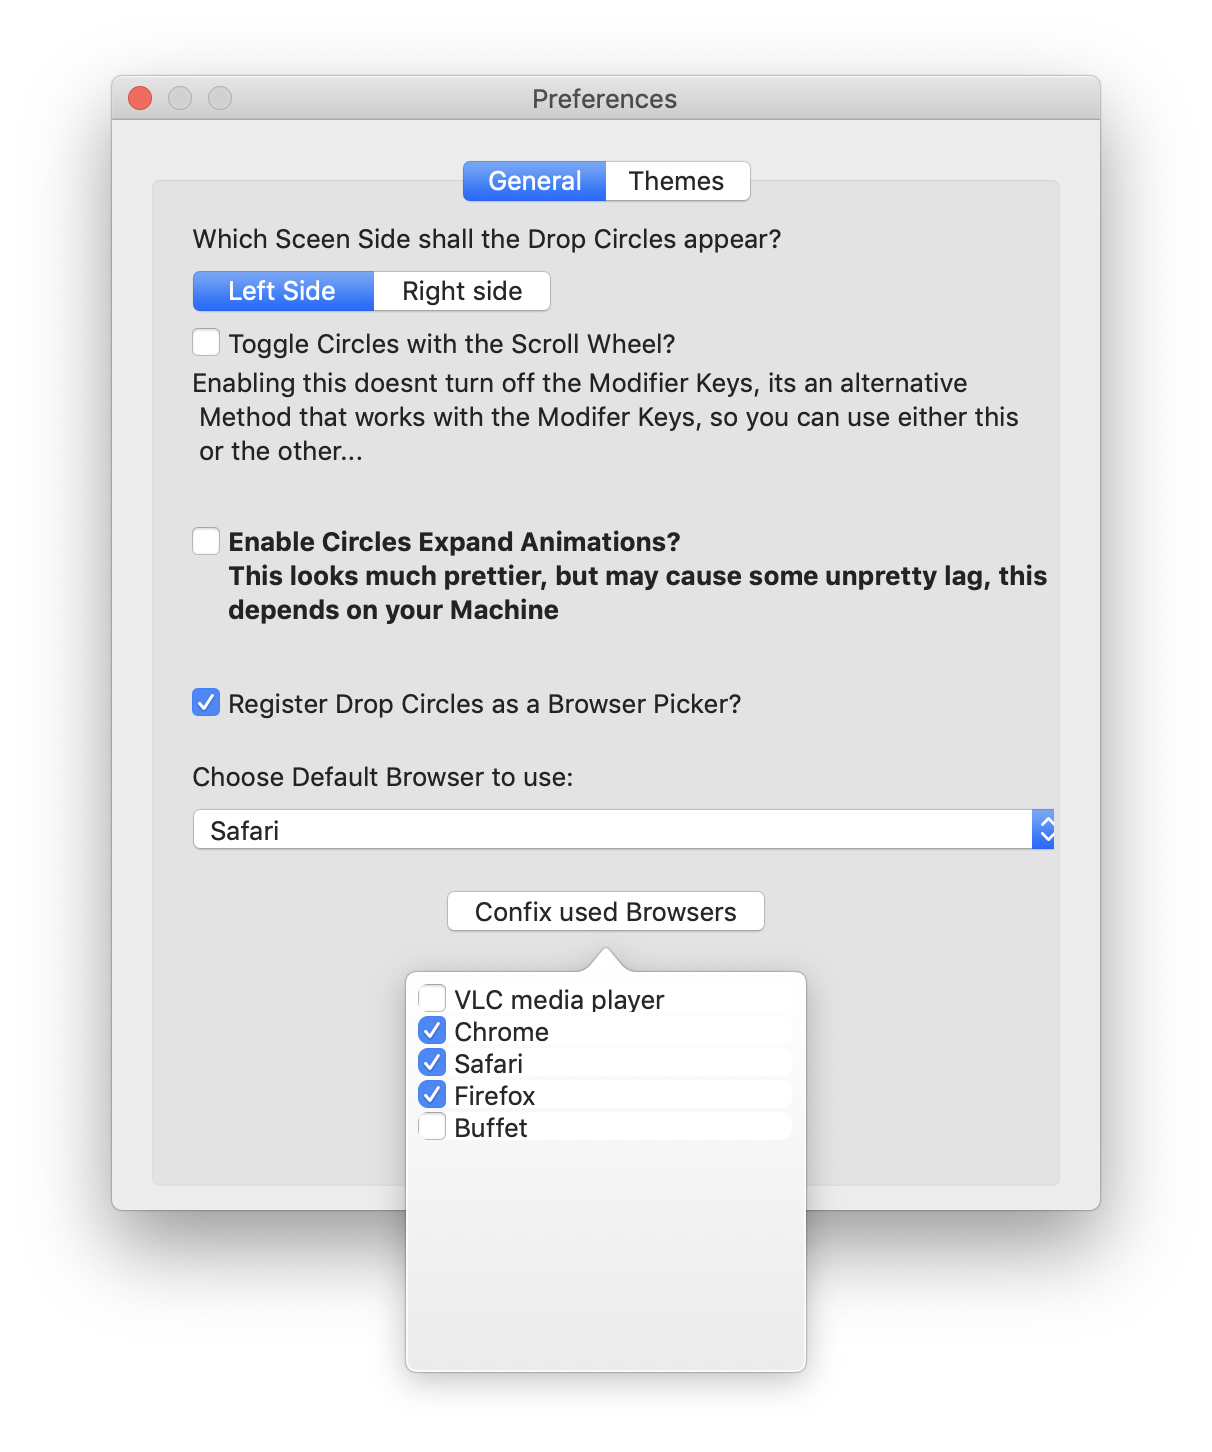
Drop Circles can act as a Browser Chooser on demand, on demand, because it will only nag you with the Choose Option when you request it by holding down the OPTION Key while clicking a Link.
You don’t need to setup any Browsers manually, Drop Circles offers you the same list of available Browsers that MacOS already lists in “System Preferences2 -> “General” -> “Default Browser”
But it gives you the ability to exclude any entry from the List
This is very handy If you face any Website compatibility issues or restrictions, so no need to copy to pasteboard, open manually and paste address, this makes the same workflow just with 1 Click once you need it!
Drop Circles also attempts to get the origin of a Link Click Action to display it as the entry point of the Picker to indicate from where or which Application this request came from…
Drop Circle Configuration
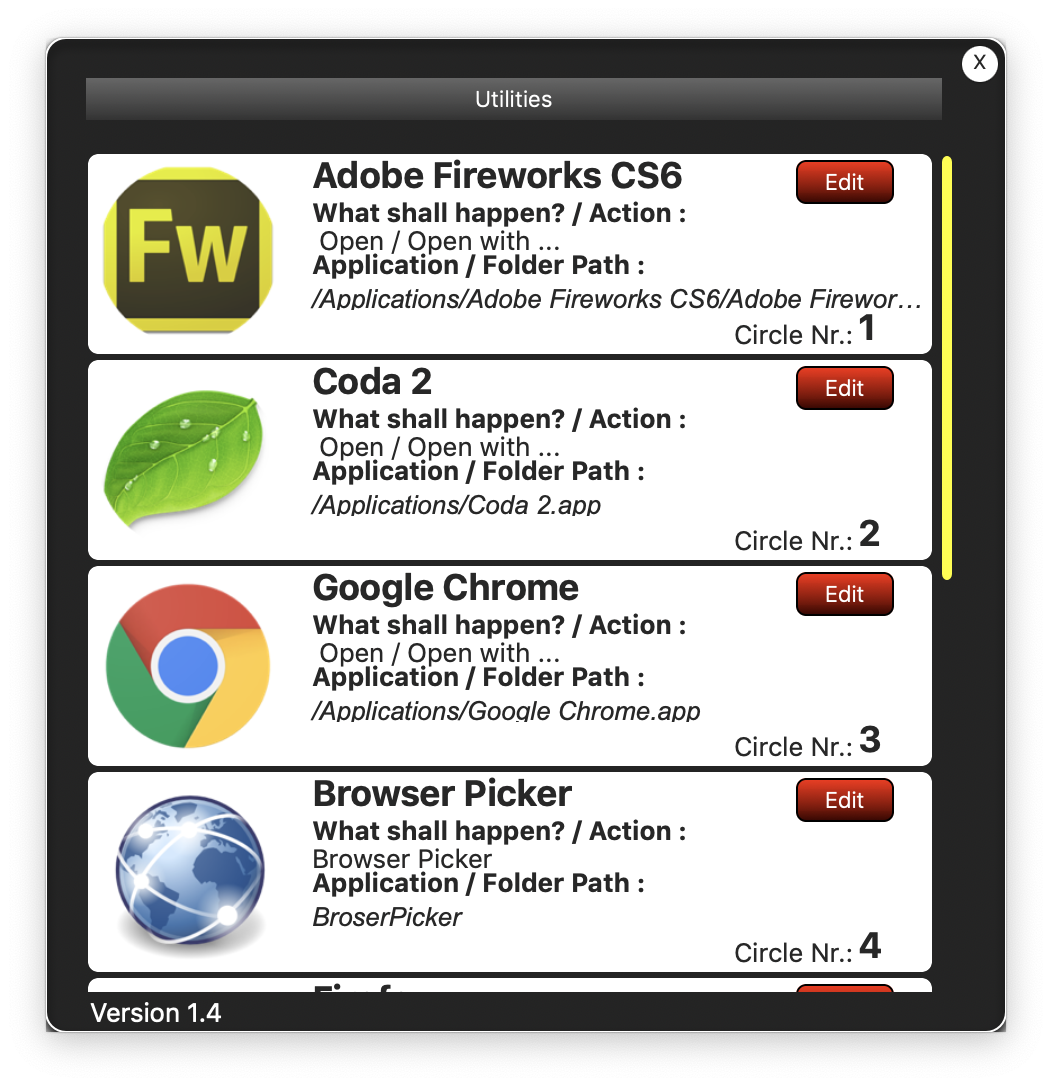
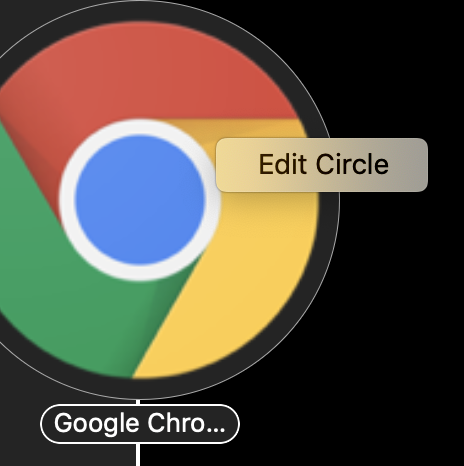
To edit or config a Circle you can either go to the Menubar and choose “Config Drop Circles” or choose the Circle you want to edit, right-click it and choose “Edit”
From the following Window you can customise it Action, its Label and choose an own Icon. If you do not want to use the custom Icon anymore, you can simply click the “Reset Icon” Button to use the default Application Icon or Folder Icon etc…
If you choose a Circle to be a Browser Picker, just in case you want to use it manually without Drop Circles being your default Browser, it will show the Picker in the Centre of the Screen so you can use it as an Application launcher or even easier:
Drag & Drop any Link onto this Circle, the Picker appears and you need to choose the Browser of choice to continue, that’s very handy and fast.
Once you have configured all your Circles, you can rearrange this position by drag & drop the Items in the List, a Position Label in the bottom right Corner tells you which Position it currently has, this is to be able to simply set a particular Circle into the first Set of Circles without the need to edit it each time…
Known Issues:
Quicklook means Drop Circles requires Read File Permissions, and they are granted for a certain time by MacOS, but after 24h or similar this rights expire and you cannot access them with Quicklook to see the File Content e.g. a Document, you get a brief overview instead
From the following Window you can customise it Action, its Label and choose an own Icon. If you do not want to use the custom Icon anymore, you can simply click the “Reset Icon” Button to use the default Application Icon or Folder Icon etc…
If you choose a Circle to be a Browser Picker, just in case you want to use it manually without Drop Circles being your default Browser, it will show the Picker in the Centre of the Screen so you can use it as an Application launcher or even easier:
Drag & Drop any Link onto this Circle, the Picker appears and you need to choose the Browser of choice to continue, that’s very handy and fast.
Once you have configured all your Circles, you can rearrange this position by drag & drop the Items in the List, a Position Label in the bottom right Corner tells you which Position it currently has, this is to be able to simply set a particular Circle into the first Set of Circles without the need to edit it each time…
Quicklook means Drop Circles requires Read File Permissions, and they are granted for a certain time by MacOS, but after 24h or similar this rights expire and you cannot access them with Quicklook to see the File Content e.g. a Document, you get a brief overview instead
The Center Drop Area

The Centre Drop area is a “Drop anything for later” Section, you can either drop Files from Finder here and drag them out later to a new location, drop Text Snippets or Images from a Website or one Application, review them later and drag & drop it into another Document e.g.
And now the Drop area allows you to quicklook Items with native MacOS Quicklook, simply select one Item and hit the Spacebar, works even with File Groups.
Please remember, dragging an Item out of the Shelf will automatically delete it from there, if you want to keep it, click the “Pin it” Button to make it permanent.
Whenever you enter the Center Drop with a new Item, it will display a Preview of what you are about to drop, this means, an Image from a Website does not mean it is really an Image, it might be a Link or something else, so please keep this in mind if Drop Circles does not create a Drop you expected to have, verify!
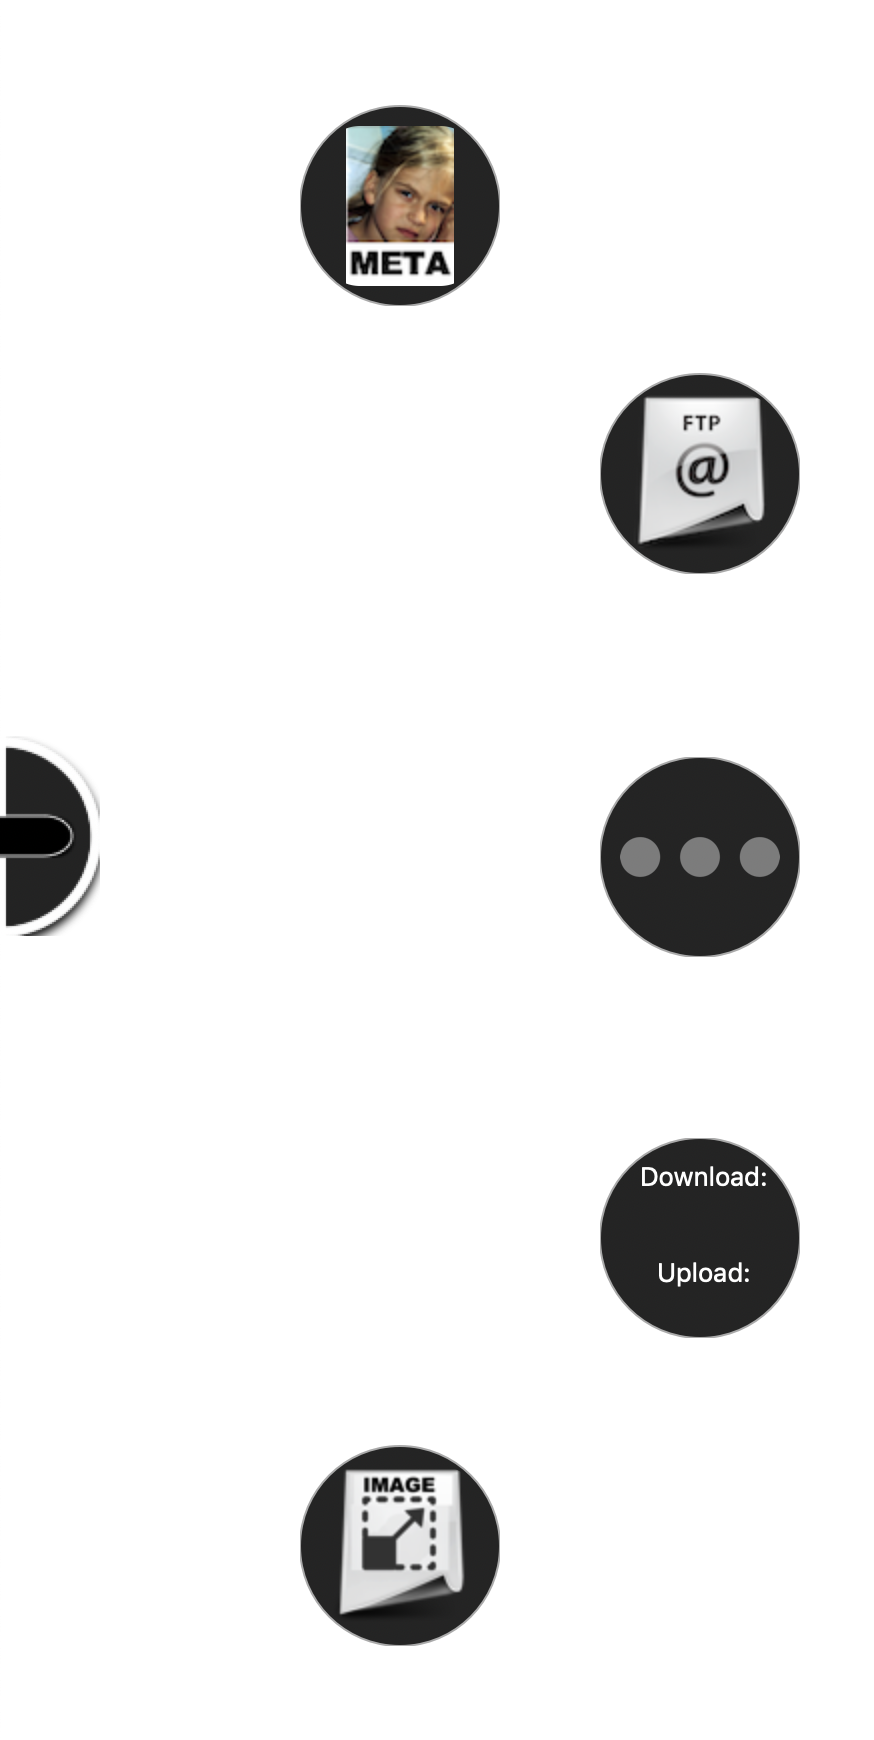
Utilities
Drop Circles comes with some Utility Circles for various tasks.
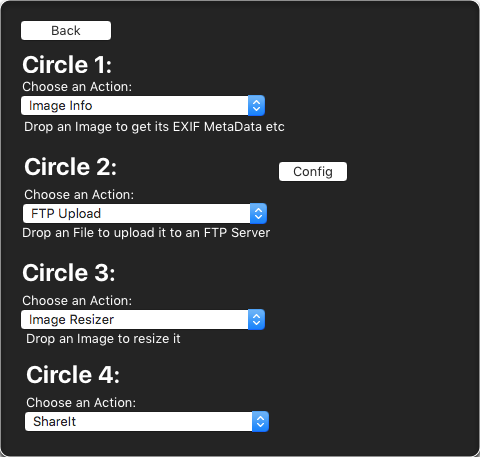
Drop Circles offers you 8 Circles for your Actions and 4 Circles reserved for Utilities, they are the l3rd and last set of Circles, fast access by hitting the COMMAND Key while expanded.
Drop Circles currently supports this Utility Circles:
Image Info: Drop any Image onto it to get extended Informations about its size, colours, metadata and if available a GPS Location on a Map.
Imre Resize; Drop any Image and resize it to a given Pixel size.
ShareIt: Drop any shareable Content onto it and it will offer you a quick way to share Items directly to social Media, this relies on the MacOS built in Sharing Services
SleepR: A lightweight Sleep Timer for your Mac to put the system into sleep after a given time in Minutes
System Tracker: Displays the current CPU and Memory Usage right in the Circle or on the Desktop as a HUD
Network Tracker: Similar to the System Tracker but shows the current Up- and Download Speeds of your Network/ Internet Connection
Themes

Drop Circles 2 supports a very basic way of theming, not the Circles themselves but theActivation Lip that slides out when you touch the Screen Edge, it’s nothing else than a cosmetic feature, but it can be funny anyway.
To change the default Activator Theme, download one of the following Themes, these were created for Demo Purposes, you can even create your own if you like to play with Images.
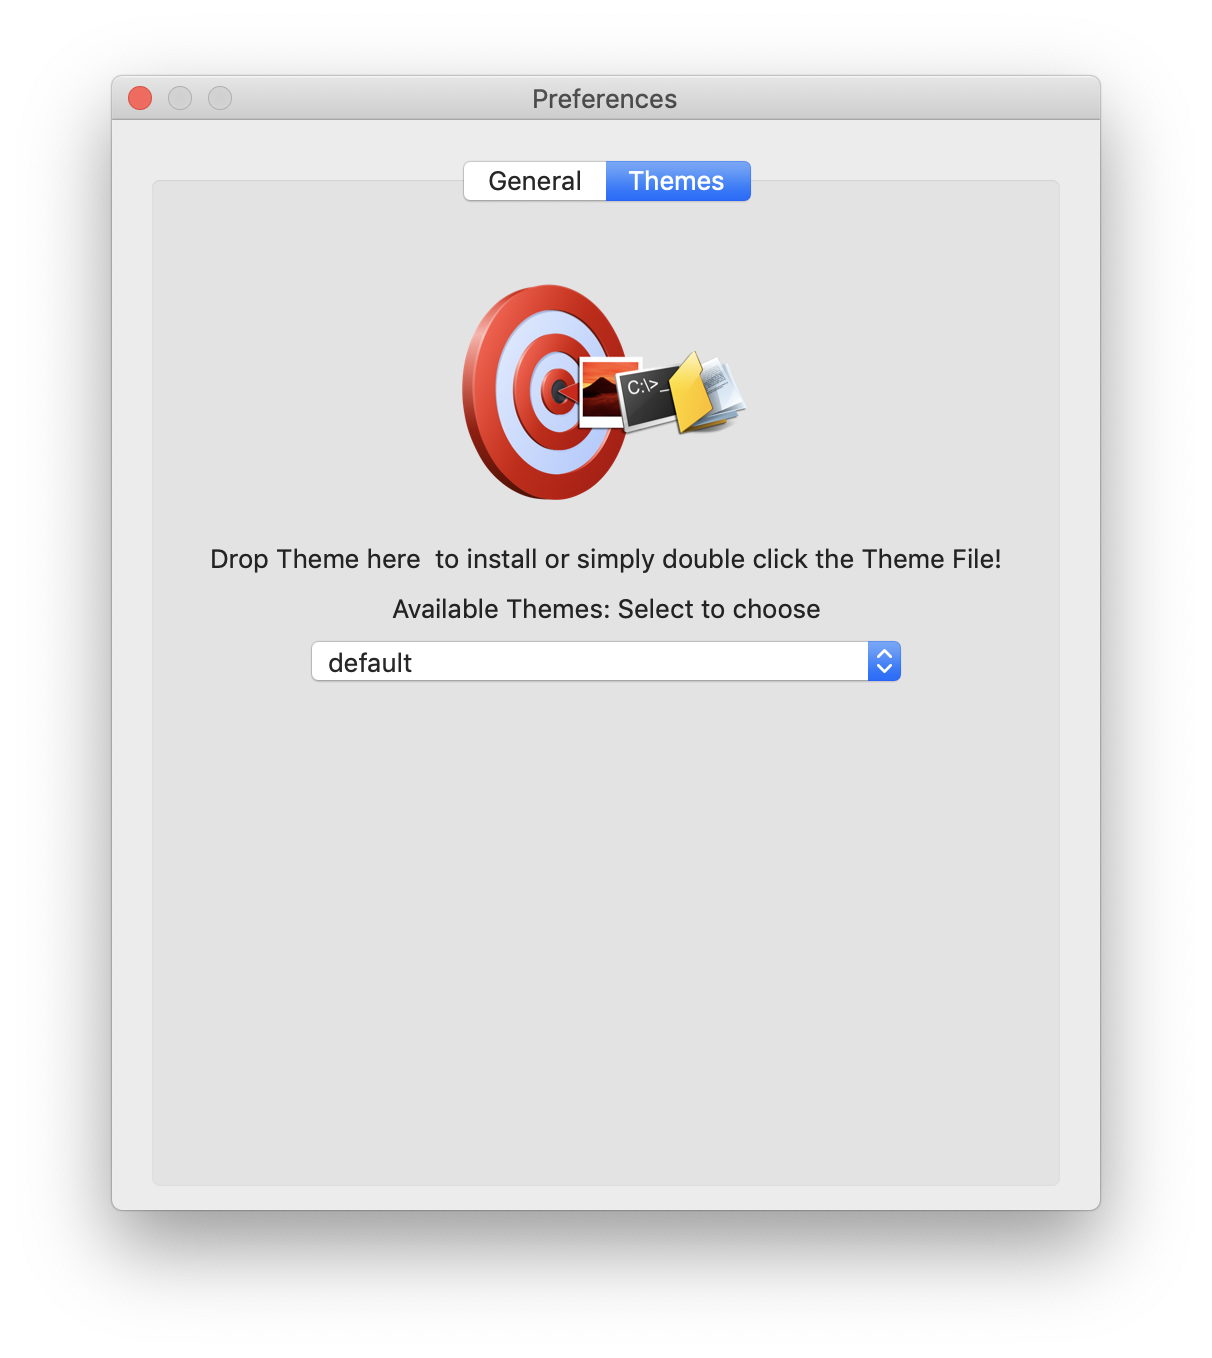
Once you downloaded the Theme File, you can either double-click it to install of open Preferences Window, go to Themes and drag & drop it onto the destination point to install, after that it will appear in the Drop down Menu and can be selected.
One of the interesting features of Themes is that they define the size of the Activation Lip, so if you create one with a large Image, the Activator will grow as well…
Important Notice: Do not mess with transparency in the Images, because if you click into a transparent Area of the Activator, this Click will be ignored!
How to create a Theme:
A theme consists of 3 Files:
a left side Image
- a right side Image
An Info.plist that tells Drop Circles how these Images are named.
You put this 3 files into a Folder, zip it into an Archive and change the Extension from ZIP to “CirclesTheme”, that’s all!
If you are interested in this grab the following Template, its just one of the Samples prepared for editing, just edit the Images or replace them with yours, name them the same way they are right now and create the Theme File as described above.
Here are 2 Themes to try:
Spidey Theme
MCU - Cap's shield Theme
And here is the Template;
MCU - Cap's shield Theme
To change the default Activator Theme, download one of the following Themes, these were created for Demo Purposes, you can even create your own if you like to play with Images.
Once you downloaded the Theme File, you can either double-click it to install of open Preferences Window, go to Themes and drag & drop it onto the destination point to install, after that it will appear in the Drop down Menu and can be selected.
One of the interesting features of Themes is that they define the size of the Activation Lip, so if you create one with a large Image, the Activator will grow as well…
Important Notice: Do not mess with transparency in the Images, because if you click into a transparent Area of the Activator, this Click will be ignored!
How to create a Theme:
A theme consists of 3 Files:
a left side Image
- a right side Image
An Info.plist that tells Drop Circles how these Images are named.
You put this 3 files into a Folder, zip it into an Archive and change the Extension from ZIP to “CirclesTheme”, that’s all!
If you are interested in this grab the following Template, its just one of the Samples prepared for editing, just edit the Images or replace them with yours, name them the same way they are right now and create the Theme File as described above.
Here are 2 Themes to try:
Spidey Theme
MCU - Cap's shield Theme
And here is the Template;
MCU - Cap's shield Theme